Mac in Search document
How to Identify, Test and Preserve an Early Home Computer

By Iris Chen
A late-1970s home computer can be studied safely without treating it as a display piece or powering it on immediately. Its case, keyboard, circuit board…
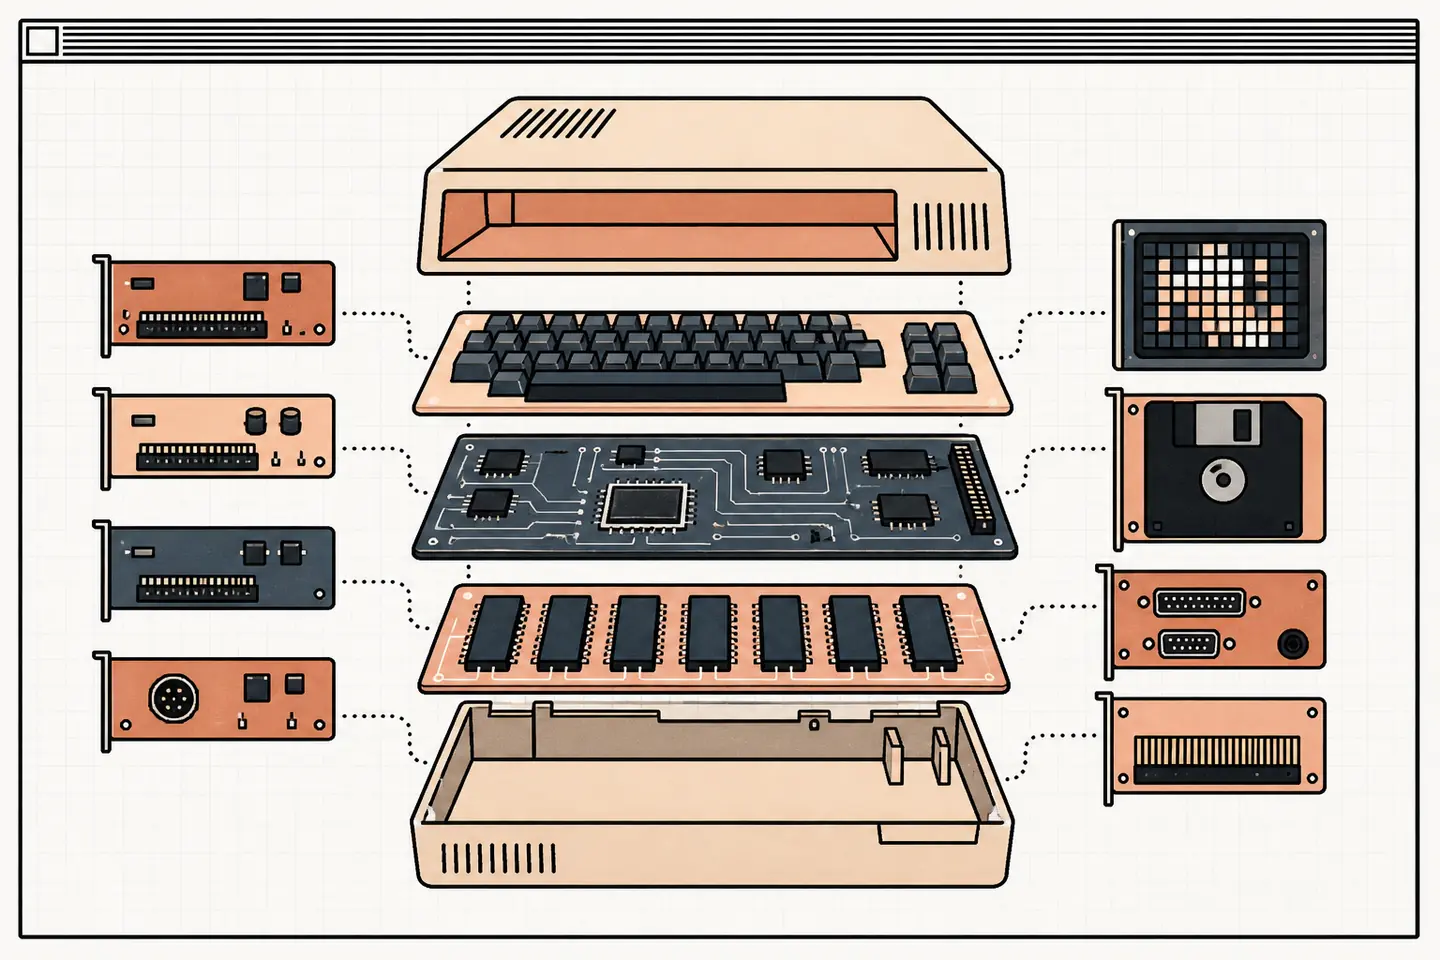
A late-1970s home computer can be studied safely without treating it as a display piece or powering it on immediately. Its case, keyboard, circuit board, expansion cards and storage media all provide evidence about how it was built and used. Careful inspection protects that evidence while helping you decide whether the machine is suitable for repair, demonstration or archival storage.
The most useful approach is methodical: record the machine as found, identify obvious hazards, separate testing from restoration and preserve original parts even when replacements are needed. This guide explains each step without assuming specialist equipment.
Why the Design Matters
This generation helped move personal computing beyond exposed circuit-board kits. A complete case, integrated keyboard, video output and internal power supply made the machine easier to place in a home, classroom or small office. Contemporary accounts associate its public introduction with the 1977 West Coast Computer Faire, an event that brought hobbyist and consumer computing into the same exhibition space.
The internal layout remained unusually accessible. Removable peripheral cards could add storage control, printing, serial communication, extra memory or alternative display functions. The provision of eight internal expansion slots meant an owner could adapt the computer instead of replacing the main board. Surviving machines therefore vary widely, and an unfamiliar card may be an important period upgrade rather than an unwanted addition.
The same flexibility shaped the software. Built-in programming tools encouraged people to type, alter and save their own programs, while removable disks supported educational, business and entertainment software. Understanding a particular machine requires looking at its hardware and media together.
Record the Machine Before Changing It
Begin with photographs of every side of the case, the keyboard, labels, ports and cables. Photograph the interior only after the machine is disconnected from power. Include wide views that show where each card and cable sits, followed by close views of board markings, component labels and visible repairs.
Create a simple written inventory:
- case style, badge wording and serial label;
- motherboard markings and revision information;
- the position and apparent purpose of each expansion card;
- drive types, cable orientation and external peripherals;
- missing keys, screws, covers or connectors;
- corrosion, heat damage, cracked parts or non-factory wiring.
Do not clean away pencil notes, service labels or handwritten disk sleeves before recording them. Such details can connect a peripheral to its software or explain an old modification. Place removed screws and small fittings in labelled containers so that later work remains reversible.
Inspect Safely Before Applying Power
Old electronics can fail because of damaged mains wiring, deteriorated capacitors, corrosion or previous repairs. A machine that looks complete is not necessarily safe to energise. If the power supply has a frayed lead, a burnt smell, liquid residue, loose mains parts or a blown fuse of uncertain cause, stop and ask a technician familiar with vintage equipment to assess it.
Never open a power supply merely to look inside. Capacitors may retain a dangerous charge after disconnection. Keep the computer unplugged while checking low-voltage boards, and avoid touching connector contacts with bare fingers. Static discharge can damage components, so work on a clean, non-carpeted surface and handle cards by their edges.
Remove loose dust with a soft brush and controlled, low-pressure air. Do not soak boards, scrape plated contacts or apply household polish. If corrosion is present, isolate affected batteries or leaking components only when you understand the circuit and can document the change. Aggressive cleaning can erase markings and spread contamination.
Plan a Controlled First Test
A first test should answer one question at a time. Confirm the power supply is appropriate for the machine and local mains voltage. Check that cards are seated in their recorded positions and that no loose screw or conductive object remains inside. Connect only the keyboard, a known-compatible display and the minimum hardware needed to observe startup.
Keep storage drives disconnected for the initial power check unless the computer requires one to start. Watch for smoke, unusual noise, strong odour or rapidly increasing heat, and disconnect power immediately if any appears. A blank or unstable display does not justify repeated power cycling; it calls for diagnosis.
If the machine reaches a prompt or diagnostic screen, record the exact text and photograph the display. Test a small set of keys before adding peripherals. Then connect one device at a time, powering down between changes. This sequence makes a fault easier to locate and reduces the risk of damaging several parts at once.
Check Display, Keyboard and Expansion Hardware
Early home computers commonly used a television-standard composite signal. The correct cable and a compatible display are essential; a modern panel may mishandle the low-resolution or interlaced signal even when the computer works. Poor colour, rolling images or missing detail may indicate display incompatibility rather than a failed video circuit.
Test the keyboard with a short list that covers letters, numbers, return, space and control keys. Do not force a stiff key. Dirt, worn contacts and damaged mechanisms require different repairs, so note whether the problem affects one key, a row or the entire keyboard.
For expansion cards, record slot position before removal. Inspect edge contacts, sockets, cables and added wires under good light. Do not assume a card belongs in a different slot because a later guide shows another arrangement. Firmware and software may expect a particular position, and a hand-wired modification may depend on the existing layout.
Preserve Disks and Other Media
Magnetic media often holds the most fragile part of the system's history. Treat every original disk as read-only until it has been imaged. Keep it away from magnets, moisture, direct sun and untested drives. A dirty or misaligned drive can damage a disk surface during a single attempt.
Inspect the sleeve and visible disk surface without touching the magnetic coating. If there is mould, debris, creasing or unusual resistance when the disk turns, do not insert it into a drive. Specialist cleaning and imaging may recover data without sacrificing the original.
When a disk is readable, create a verified image and keep at least two copies on separate storage. Record the label text, image format, imaging date, drive used and any read errors. Use a duplicate image for emulation or experimentation, leaving the first capture unchanged. Established catalogues, including material held by the Centre for Computing History, can help distinguish known releases from personal or locally modified disks.
Use Documentation and Emulation Carefully
Match manuals to the board revision and peripheral, not merely to the family name on the case. Connector pin-outs, memory arrangements and startup behaviour may differ between revisions. Prefer scanned contemporary manuals, museum catalogues and established archives over unsourced repair summaries.
Emulation is useful for examining disk images without repeatedly using original hardware. Choose software that models the relevant memory, display and peripheral arrangement, and use legally obtained firmware and disk images. Keep the archival image separate from emulator-created save states or modified copies.
An emulator can also clarify whether a problem belongs to the software or the physical computer. If a verified image works in an accurately configured emulator but fails on the original machine, investigate the drive, controller, memory or configuration. If it fails in both places, the image or software may be incomplete.
Store the Collection for Future Study
Long-term storage should be cool, dry, stable and free from direct sunlight. Avoid sealed plastic around equipment that may retain moisture. Support heavy units from underneath, keep cables loosely coiled and store removable cards in anti-static packaging with clear labels.
Keep a preservation record beside the digital photographs and media images. Note every repair, replacement and test, including dates and the original parts retained. If a failed component is replaced, label and store the old part unless it presents a safety hazard. Future researchers may learn from markings that a modern substitute cannot preserve.
The aim is not to make every machine look new. A sound preservation project protects original evidence, makes necessary work traceable and allows another person to understand what changed. With careful documentation, controlled testing and verified media copies, an early home computer can remain both intelligible and usable without sacrificing its history.